Diving into the world of baking, a caramel cake recipe stands out as a hallmark of comfort and indulgence. This treat, known for its rich flavor and moist sponge, is a testament to the timeless charm of homemade desserts. In this comprehensive guide, we’ll embark on a culinary journey, exploring the steps to creating a perfect caramel cake, complemented by homemade icing that elevates it to a sublime level. So, whether you’re a seasoned baker or a newcomer to the kitchen, this guide promises to equip you with all you need to bake a masterpiece that’s bound to impress.
Introduction to Caramel Cake
The caramel cake, a dessert as rich in history as it is in flavor, has long been a staple at gatherings, offering a perfect blend of sweetness and texture that captivates the palate. Its origins, while not precisely documented, are deeply rooted in the tradition of Southern cooking, embodying the warmth and hospitality synonymous with the region. Today, this cake enjoys popularity far beyond its Southern confines, celebrated for its moist sponge and decadent caramel icing.
A Brief History and Popularity
Ah, the caramel cake! It’s more than just a dessert; it’s a piece of culinary heritage. Initially cherished in the Southern United States, it has woven its way into the fabric of American dessert culture. The cake’s popularity isn’t just by chance; its indulgent caramel icing atop layers of soft, buttery cake makes it irresistible. Over time, it has found its place in cookbooks and hearts worldwide, evolving into a dessert that transcends occasions.
Why It’s Beloved in Every Slice
But what truly makes a caramel cake so special? Is it the rich, velvety texture or the deep, comforting flavor of caramel that lingers with every bite? Perhaps it’s the joy it brings to those who bake and those who indulge. This cake is not just for the taste buds; it’s an experience, a way to bring people together, making it a favored choice for celebrations and quiet, cozy afternoons alike.
So, buckle up! We’re about to dive into the world of baking where the caramel cake reigns supreme. From selecting the right ingredients to mastering the art of caramel icing, this guide will walk you through every step, ensuring your baking adventure culminates in the creation of a truly remarkable dessert.
Ingredients and Preparations
Before we embark on the journey of baking this exquisite caramel cake, gathering our ingredients and preparing our baking station is crucial. This stage sets the foundation for a smooth baking experience, ensuring that everything you need is at arm’s reach.
Ingredients List
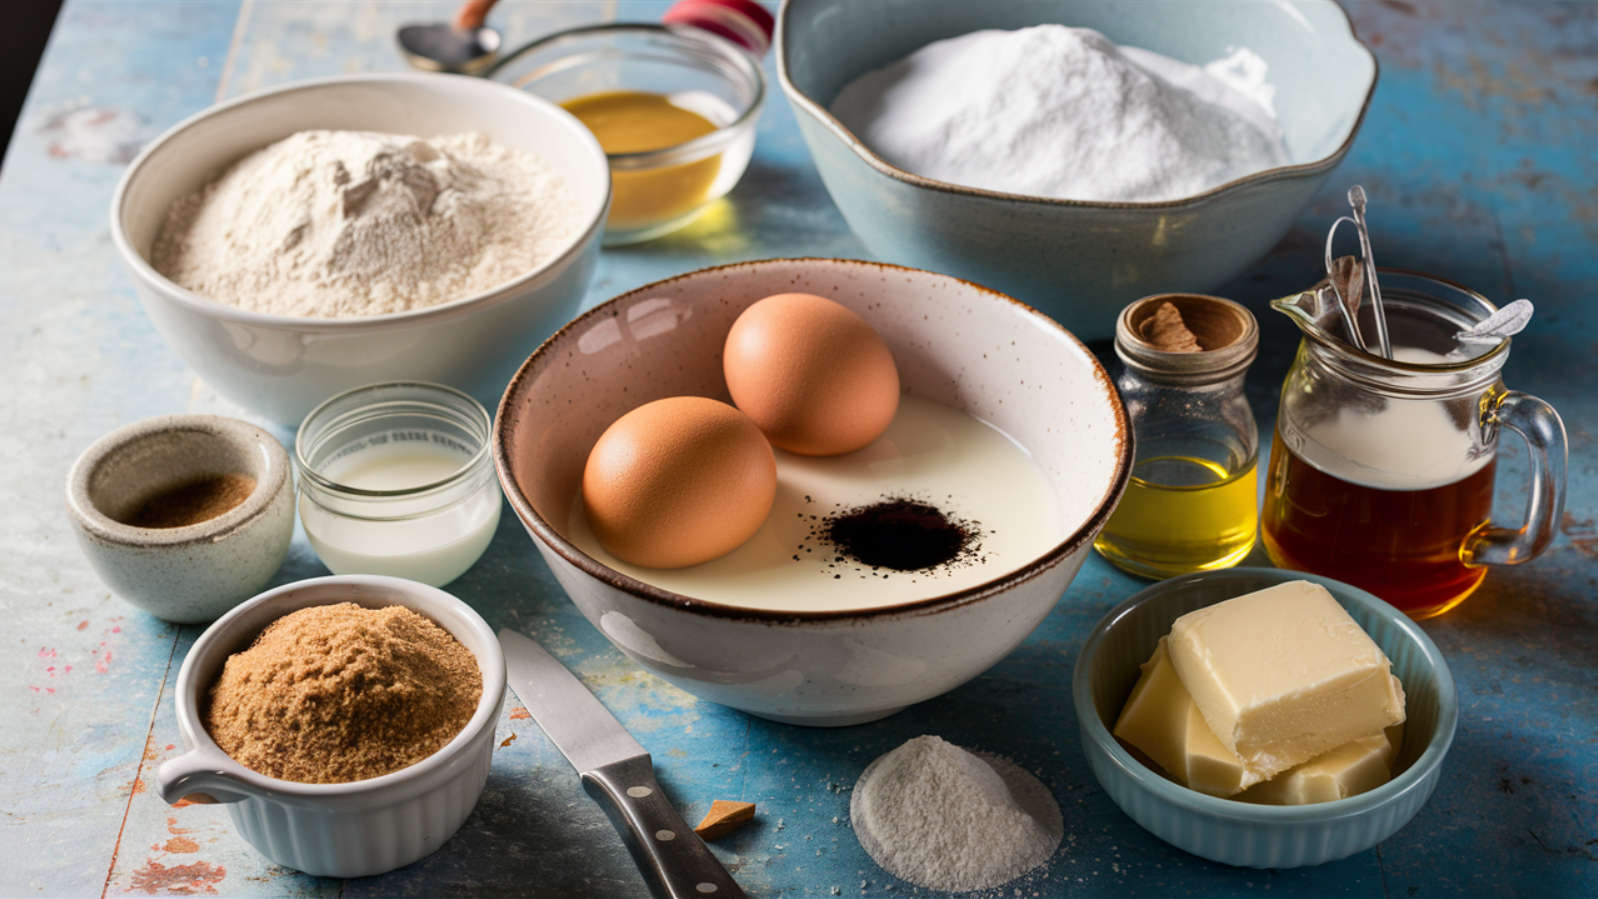
First things first, let’s talk ingredients. For a cake that’s a cut above the rest, using high-quality ingredients is key. Here’s what you’ll need:
- For the Cake:
- 2 cups of all-purpose flour – the backbone of our cake, providing structure.
- 1 cup of unsalted butter, softened – for that rich, melt-in-your-mouth feel.
- 1 and 1/2 cups of white sugar – to sweeten the deal.
- 4 large eggs – binding everything together with finesse.
- 1 cup of milk – adding moisture to our cake, making it oh-so tender.
- 2 tsp of vanilla extract – a splash of flavor that makes all the difference.
- 3 tsp of baking powder – our rising star, ensuring our cake is fluffy and light.
- A pinch of salt – to balance and enhance the flavors.
- For the Caramel Icing:
- 1 cup of brown sugar – the heart of our caramel icing, offering deep, molasses-like sweetness.
- 1/2 cup of unsalted butter – adding creaminess to our icing.
- 1/4 cup of evaporated milk – for a silky, smooth texture.
- 1 tsp of vanilla extract – because a little more flavor never hurt.
- 2 cups of confectioners’ sugar – to sweeten and thicken our icing to perfection.
Preparation Before Baking
With our ingredients ready, it’s time to prep:
- Assemble Your Tools: You’ll need three 9-inch cake pans, mixing bowls, an electric mixer, and a saucepan for the icing. Having everything on hand will make the process smoother and more enjoyable.
- Preheat Your Oven: Set it to 350 degrees F (or 175 degrees C). A properly heated oven is crucial for a cake that’s baked evenly.
- Prep Your Pans: Grease and flour your cake pans. This ensures your cake layers come out beautifully without sticking.
- Measure Your Ingredients: Accuracy is key in baking. Measure your ingredients beforehand to streamline the mixing process.
Preparing for a caramel cake isn’t just about following steps; it’s about starting your baking journey with confidence and excitement. With everything in place, you’re now ready to dive into the art of making the cake itself, where the magic really begins. Stay tuned, as we’re about to mix, bake, and ice our way to caramel cake perfection.
Step-by-Step Baking Guide
Embarking on the baking journey of our caramel cake is where the excitement truly unfolds. Follow these steps closely, and you’ll be on your way to creating a dessert that’s as delightful to make as it is to savor.
Making the Cake
Mixing the Batter
- Creaming Butter and Sugar: Start by placing your softened butter and white sugar in a large mixing bowl. Using an electric mixer, beat them on medium speed until the mixture is light and fluffy. This process introduces air into the batter, making for a lighter cake.
- Adding Eggs: One at a time, add the eggs, fully incorporating each before adding the next. This ensures a smooth, homogenous batter.
- Alternating Dry and Wet Ingredients: In another bowl, whisk together the flour, baking powder, and salt. Add this to your butter mixture in batches, alternating with the milk. Begin and end with the dry ingredients. Why, you ask? This method helps to maintain the batter’s structure, preventing it from curdling.
- Vanilla Extract: Mix in the vanilla extract. Just a teaspoon transforms the flavor, adding depth and warmth to your cake.
- Divide and Conquer: Evenly distribute the batter among your prepared pans. A smooth, even layer promises a uniform bake.
Baking the Cake
- Oven Time: Slide your pans into the preheated oven. Bake for about 30 minutes, or until a toothpick inserted into the center comes out clean. The aroma filling your kitchen? That’s the sweet scent of success.
- Cooling: Allow the cakes to cool in the pans for a few minutes before transferring them to a wire rack. This step is crucial; it stops the baking process and makes the cakes easier to handle when icing.
Preparing the Caramel Icing
Cooking the Caramel
- Melting Sugar and Butter: In a saucepan over medium heat, melt together the brown sugar and butter. Stir continuously until the sugar is fully dissolved. This mixture is the base of our caramel icing, rich and full of flavor.
- Adding Evaporated Milk: Pour in the evaporated milk and continue stirring. Bring the mixture to a gentle boil, then let it bubble for about 4 minutes. Keep that stir going to prevent sticking and burning.
- Cooling: Remove the saucepan from the heat and let it cool for a few minutes. This step is vital for achieving the right consistency for spreading.
Icing the Cake
- Mixing in Confectioners’ Sugar: To your cooled caramel mixture, add confectioners’ sugar and vanilla extract. Beat with an electric mixer until the icing is smooth and reaches your desired thickness.
- Assembling the Cake: Spread the icing between the cooled cake layers, then stack them. Don’t forget the top and sides. The icing should be generous but not overwhelming, creating a beautiful balance with the cake.
Creating the perfect caramel is an art that requires patience and a keen eye. For those interested in diving deeper into the nuances of caramel preparation and its use in baking, King Arthur Baking offers a comprehensive guide on Baking with Caramel, which can elevate your dessert creations to a whole new level.
And there you have it, your masterpiece is complete. The caramel cake stands as a testament to your dedication and skill, a dessert that’s sure to dazzle and delight. With each slice, the perfect sponge and luscious caramel icing come together in harmony, creating moments of joy for all who taste it.
Tips and Tricks for the Perfect Caramel Cake

A caramel cake that dazzles is all about the little details that make a big difference. Here are some insider tips and tricks to elevate your cake from good to unforgettable.
Baking Tips
- Room Temperature Ingredients: Ensure your butter, eggs, and milk are at room temperature before starting. This simple step makes a world of difference, ensuring your batter mixes evenly and bakes up perfectly.
- Don’t Overmix: After adding the flour, mix just until the ingredients are combined. Overmixing can lead to a dense, tough cake because it develops the gluten too much.
- Even Layers: Use a kitchen scale to divide the batter equally between the pans. Even layers bake at the same rate and stack beautifully, making your cake not only taste great but look professional, too.
- Cake Strips: Consider using wet cake strips around your pans. They keep the edges cooler, promoting a flat top rather than a domed one, which can be a game-changer for layer cakes.
Caramel Icing Tips
- Watch the Heat: When making the caramel, keep the heat medium to low. It’s tempting to turn it up to speed the process, but patience pays off with a smooth, burn-free caramel.
- Consistency is Key: The icing should be thick enough to stick to the cake but still spreadable. If it’s too thin, add a little more confectioners’ sugar; if too thick, a splash of milk can help.
- Cooling the Cake: Fully cool the cake layers before applying icing. Warm cake can cause the icing to melt and slide, leading to a messy (though still delicious) outcome.
- Storage: If you’re not serving the cake immediately, store it in a cool place. The icing sets better, and the flavors have time to meld together.
With these tips in hand, you’re well-equipped to tackle the caramel cake challenge. Remember, baking is as much about the journey as the destination. Each step, from mixing the batter to spreading the icing, is an opportunity to put love and care into something truly special. So take your time, enjoy the process, and get ready to bask in the glory of a job well done when you present this masterpiece.
Common Mistakes to Avoid
Creating the perfect caramel cake can sometimes feel like navigating a minefield of potential mishaps. However, forewarned is forearmed. By being aware of common pitfalls and how to sidestep them, you’re setting yourself up for success.
Baking Mistakes
- Skipping the Oven Preheat: It might seem like a time-saver, but putting your cake into a cold oven can lead to uneven baking. Always preheat your oven to the correct temperature before baking.
- Opening the Oven Too Often: We get it, it’s tempting to check on your creation, but every peek lets heat escape, affecting the cake’s rise and texture. Use the oven light and window instead.
- Using Expired Leavening Agents: Baking powder and baking soda lose their potency over time. Expired leaveners can lead to a dense, flat cake, so check those dates.
- Not Testing for Doneness: Color can deceive. A cake might look done but still be gooey in the middle. Always use a toothpick or cake tester to ensure it’s fully baked.
Icing Mistakes
- Rushing the Cooling Process: Applying caramel icing to a warm cake is a recipe for disaster. Patience pays off in a beautifully iced cake that holds its shape.
- Overheating the Caramel: Caramel can go from perfect to burnt in a blink. Keep the heat moderate and your eyes on the prize.
- Icing Consistency: Too thick and it won’t spread; too thin and it drips off. Aim for a smooth, spreadable consistency, adjusting with milk or confectioners’ sugar as needed.
Remember, baking is as much about patience and precision as it is about creativity and passion. By avoiding these common mistakes, you’re not just baking a caramel cake, you’re crafting an experience, a memory, and perhaps, a new favorite. So, take these tips to heart, approach the process with joy, and know that each step brings you closer to a deliciously rewarding outcome.

Frequently Asked Questions
In the world of caramel cake baking, questions abound. Whether it’s queries about the recipe or the process, it’s always handy to have answers. Let’s tackle some of the most common questions, ensuring you’re fully equipped to create this delectable treat.
Can I make the cake in advance?
Absolutely! The cake layers can be baked ahead of time. Once cooled, wrap them tightly in plastic wrap and store them at room temperature for a day or in the freezer for up to a month. Thaw overnight on the counter before icing.
Why did my caramel icing become grainy?
Graininess in caramel typically results from sugar crystallization. To avoid this, ensure the sugar fully dissolves when melting with the butter. Avoid stirring the caramel once it starts to boil, as this can reintroduce sugar crystals to the mixture.
Can I substitute the evaporated milk in the icing?
Evaporated milk is preferred for its richness, but you can substitute it with heavy cream or a full-fat milk in a pinch. Keep in mind, the consistency and flavor of the icing might slightly change.
My cake came out dry, what happened?
Dry cake can result from overbaking or using too much flour. Ensure you measure your ingredients accurately, preferably with a kitchen scale. Also, keep an eye on the baking time and test for doneness towards the end of the suggested time range.
How should I store the finished cake?
A fully iced caramel cake should be stored in an airtight container to keep it moist. It can be kept at room temperature for up to two days or refrigerated for up to a week. Let it come to room temperature before serving for the best flavor and texture.
Armed with these FAQs, you’re more than ready to embark on your caramel cake baking adventure. Remember, baking is a blend of science and art, and sometimes, it’s the questions and challenges along the way that make the journey all the more rewarding. So, don your apron, preheat that oven, and get ready to bake a cake that’s sure to impress.
Conclusion and Serving Suggestions
As we wrap up our caramel cake journey, let’s take a moment to revel in the achievement. Baking this cake isn’t just about following a recipe; it’s about creating something that brings joy, something that gathers people around the table to share in its rich, moist layers and silky caramel icing. Whether it’s for a special occasion or a simple weekday treat, your caramel cake is sure to leave a lasting impression.
Whether it’s for a special occasion or a simple weekday treat, your caramel cake is sure to leave a lasting impression. If you’re in the mood to explore more delightful cake recipes, our Baker’s German Chocolate Cake Recipe offers another decadent option to enchant your taste buds.
Wrapping Up
Congratulations are in order! You’ve mixed, baked, and iced your way to creating a delectable masterpiece. This cake is a testament to your dedication to the craft of baking, embodying the perfect balance of sweetness and texture that makes every bite a delight. Remember, the beauty of baking lies not just in the delicious results but in the love and care woven into every step of the process.
Serving Suggestions
To elevate your caramel cake experience, consider these serving suggestions:
- A Dusting of Flair: A light dusting of powdered sugar or a sprinkle of sea salt can add an extra layer of flavor and texture, making each slice even more irresistible.
- Pair with Cream: Serve your cake with a dollop of whipped cream or a scoop of vanilla ice cream for a creamy contrast that complements the rich caramel.
- Coffee or Tea: A cup of coffee or tea is the perfect accompaniment to this sweet treat, balancing its richness with their warmth and bitterness.
- Fresh Berries: Add a burst of freshness and color with a side of fresh berries. Their tartness is a delightful counterpoint to the cake’s sweetness.
As we conclude, it’s clear that the journey of baking a caramel cake is as rewarding as the final product. Each step, from preparing the batter to adding the finishing touches, is an opportunity to pour love into something that will be shared and enjoyed. So, here’s to you, the baker, the creator of joy. May this caramel cake be just one of many sweet adventures in your baking endeavors.
